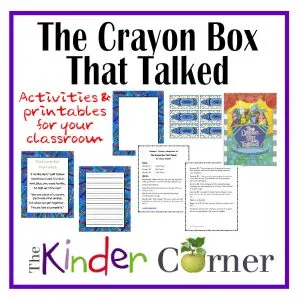
Work on classroom community by using The Crayon Box That Talked. This free collection of activities is designed to go with the book.
 Many of you are familiar with the book The Crayon Box that Talked by Shane DeRolf. If you aren’t, this is a wonderful story about a box of crayons that doesn’t get along because they feel as if they are too different. In the end they learn how they can live and work together to create amazing things.
There are several times that this book can be a great asset in the classroom. The most obvious time is when your students are working to learn colors and/or color words. However, the deeper meaning of the book lends itself to a wonderful beginning of the school year lesson or even a teachable moment when something with regards to differences rises to the surface with the students.
It’s great for times when you need to emphasize teamwork and cooperation too. Many teachers also use it to help illustrate the teachings of Dr. Martin Luther King, Jr. Whatever way you choose to use this simple, yet wonderful book, here are some resources and ideas that you might want to use.
Quote Poster – Two different options for classroom displays or bulletin boards.
Crayon Box That Talked Poster #1 Crayon Box That Talked Poster #2
Crayon Border Paper – Use this paper to have your students draw pictures or write about the book or about a discussion that the book sparked in the classroom.
Crayon Border Paper (blank) Crayon Border Paper (with lines)
Crayon Border Paper (with primary lines)
Crayon Box Border Paper (blank) Crayon Box Border Paper (with lines)
Crayon Box Border paper (with primary lines)
Crayon Portraits – You can use the oval shape in these crayons to place student pictures. They can either draw their own portrait or you may choose to take pictures of your students and add them to the center. Either way, these can be used to display on a colorful bulletin board with the message of the book as the centerpiece. You may also choose to use them as nameplates next to student work.
Crayon Melt Activity – One idea to illustrate the concept of the book is to use old crayons, have students peel the papers off and then show them how they can form different colors and crayon creations if melted together. A colleague of ours did this and used small molds to make different shapes and colors of “new” crayons. This would be a wonderful illustration of how the crayons can work together in a different way. (Amazon link to star mold below.)
Classroom Puzzle– This idea requires you to purchase a blank pre-cut puzzle (Amazon link to 28 piece puzzle below). Each student colors a piece of the puzzle in his/her own unique way. Then the class spends some time putting the puzzle together. You can discuss how the pieces are all unique – as are the students – but they can be put together to create something fun and wonderful – just like a classroom.
Crayon Craft – We saw this idea on Pinterest! Take Popsicle sticks, color or paint them different colors and glue googly eyes at one end. Draw a mouth under the eyes. Then, whatever color the Popsicle stick is painted, take the same color of pipe cleaner and wrap it around the Popsicle stick in the center, leaving an inch or two sticking out to form arms on either side. These can be used as bookmarks, student pick sticks (each student writes his/her name on one and the teacher pulls them from a jar for answering or volunteering opportunities), or even on a bulletin board. They are adorable!
Readers’ Theater Script – Use this simple Readers’ Theater script to have your students work on fluency, expression, speaking and listening. Most Reader’s Theater scripts don’t require costumes or props, but if you choose, you could have students wear various solid color aprons to match their character color and possibly create colorful pointed hats to represent the tips of the crayons.
Rhyming Word Cards – Print, laminate and cut out these cards for a quick independent center activity to practice reading and rhyming skills.
Color Matching Activity – Students use these cards to match color words to the correct colors. We suggest that you glue and laminate the color word crayon cards into a file folder. Then add a small square of Velcro tape to tops of all the cards in the folder (not covering the words). Add the other sides of the Velcro tape to the backs of the color crayon cards. Students then attach the correct color crayon cards to the color word cards in the folder.
If you are looking for the book or other items to go with the unit, we have added the Amazon links below (contains affiliate links)

Sharon Montgomery
Friday 12th of June 2015
This is perfect for the start of a new year. Thank you for posting.
Keri
Sunday 12th of October 2014
Thanks a lot for sharing this with all of us you actually know what you are speaking about! Bookmarked. Please also consult with my website =). We may have a hyperlink change contract among us